


Watch our instructional video, or scroll down for printable instructions and a photo gallery.
A raised garden bed is the serious gardener’s dream come true: From weeding to harvesting, in cool climates and waterlogged soils, Durable GreenBed raised garden beds are the perfect solution to a host of problems. The beds are made out of highly recycled content and will last for over 20 years. All you need is a place to put the bed and about an hour to complete the simple assembly.
Gardening in in our tall raised beds means you don’t have to bend over as much, preventing strain on your back. The soil warms faster in spring and drains faster in wet weather. Get our easy step-by-step instructions for building your Durable Greenbed raised bed for vegetables and other crops in your garden.
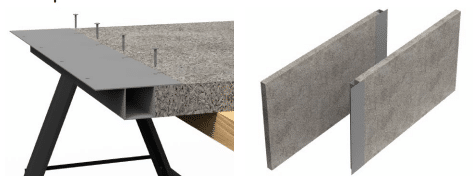
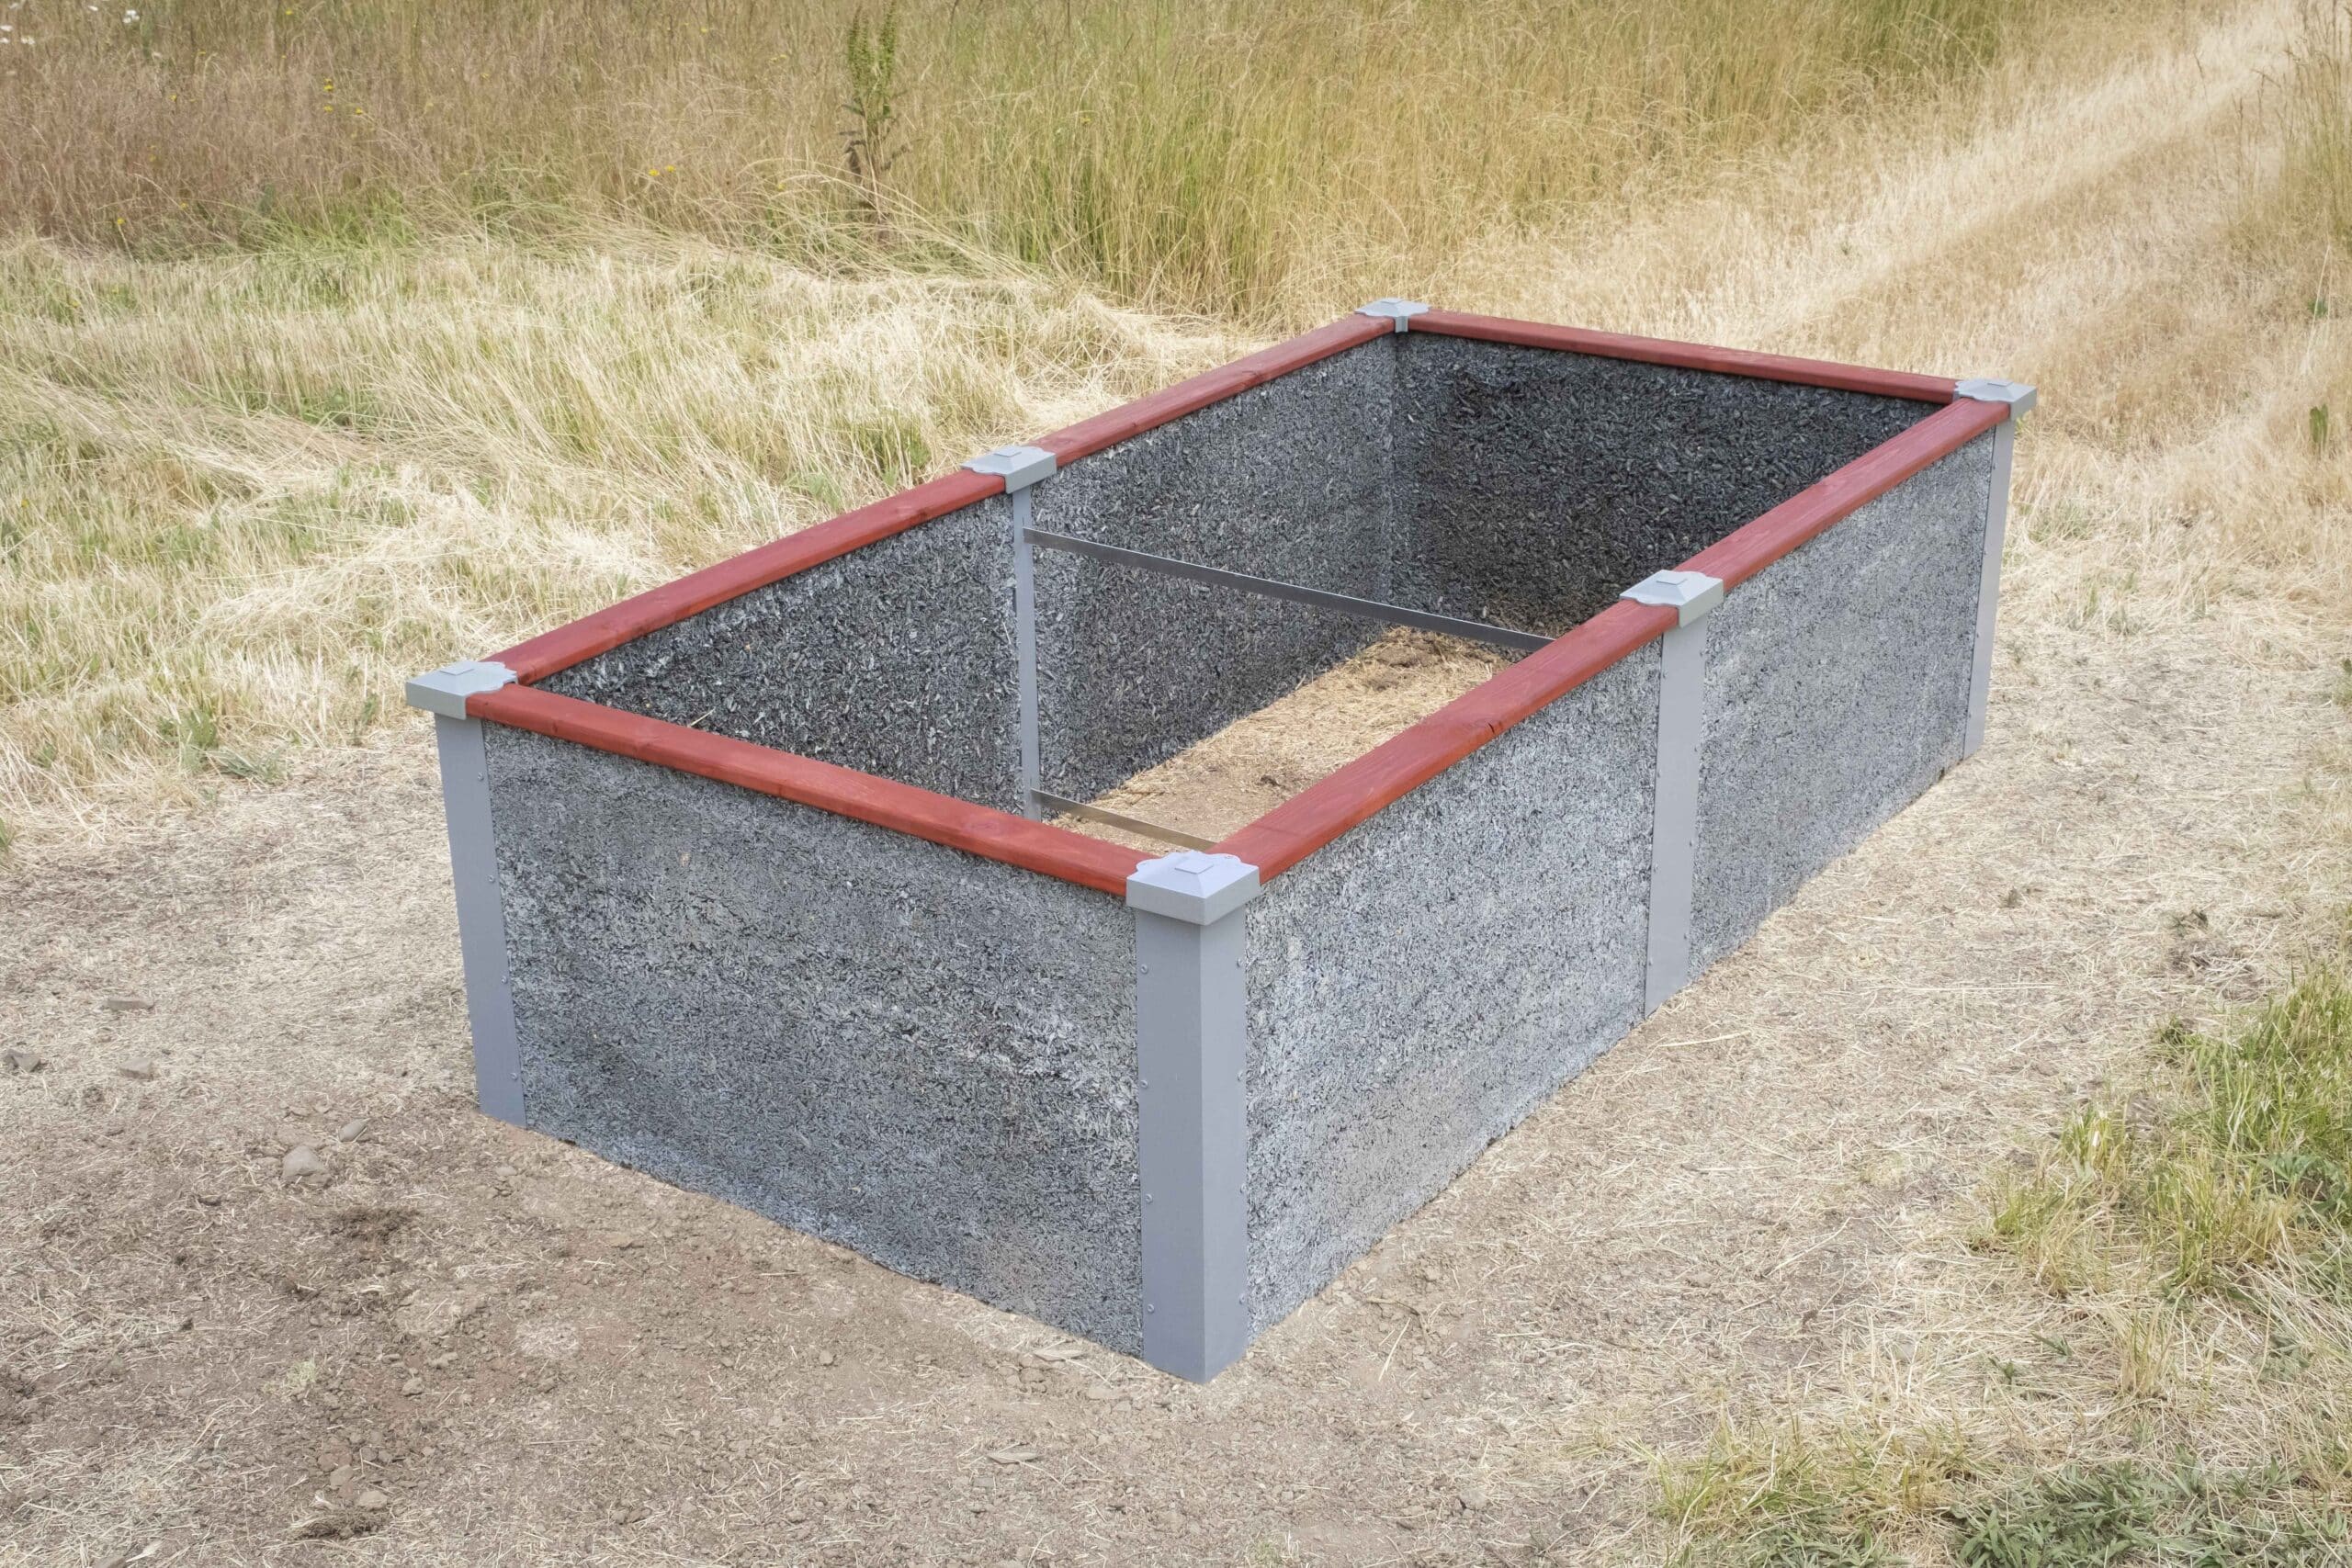
Your Completed GreenBed™ Will Provide Many Years Of Service, Far In Excess Of Wood.
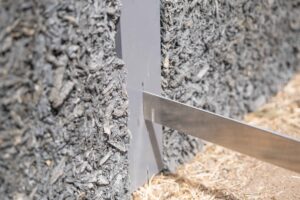
GreenBed™ panels are strong, but THEY CAN FRACTURE if handled roughly.
DO NOT stand on panels.
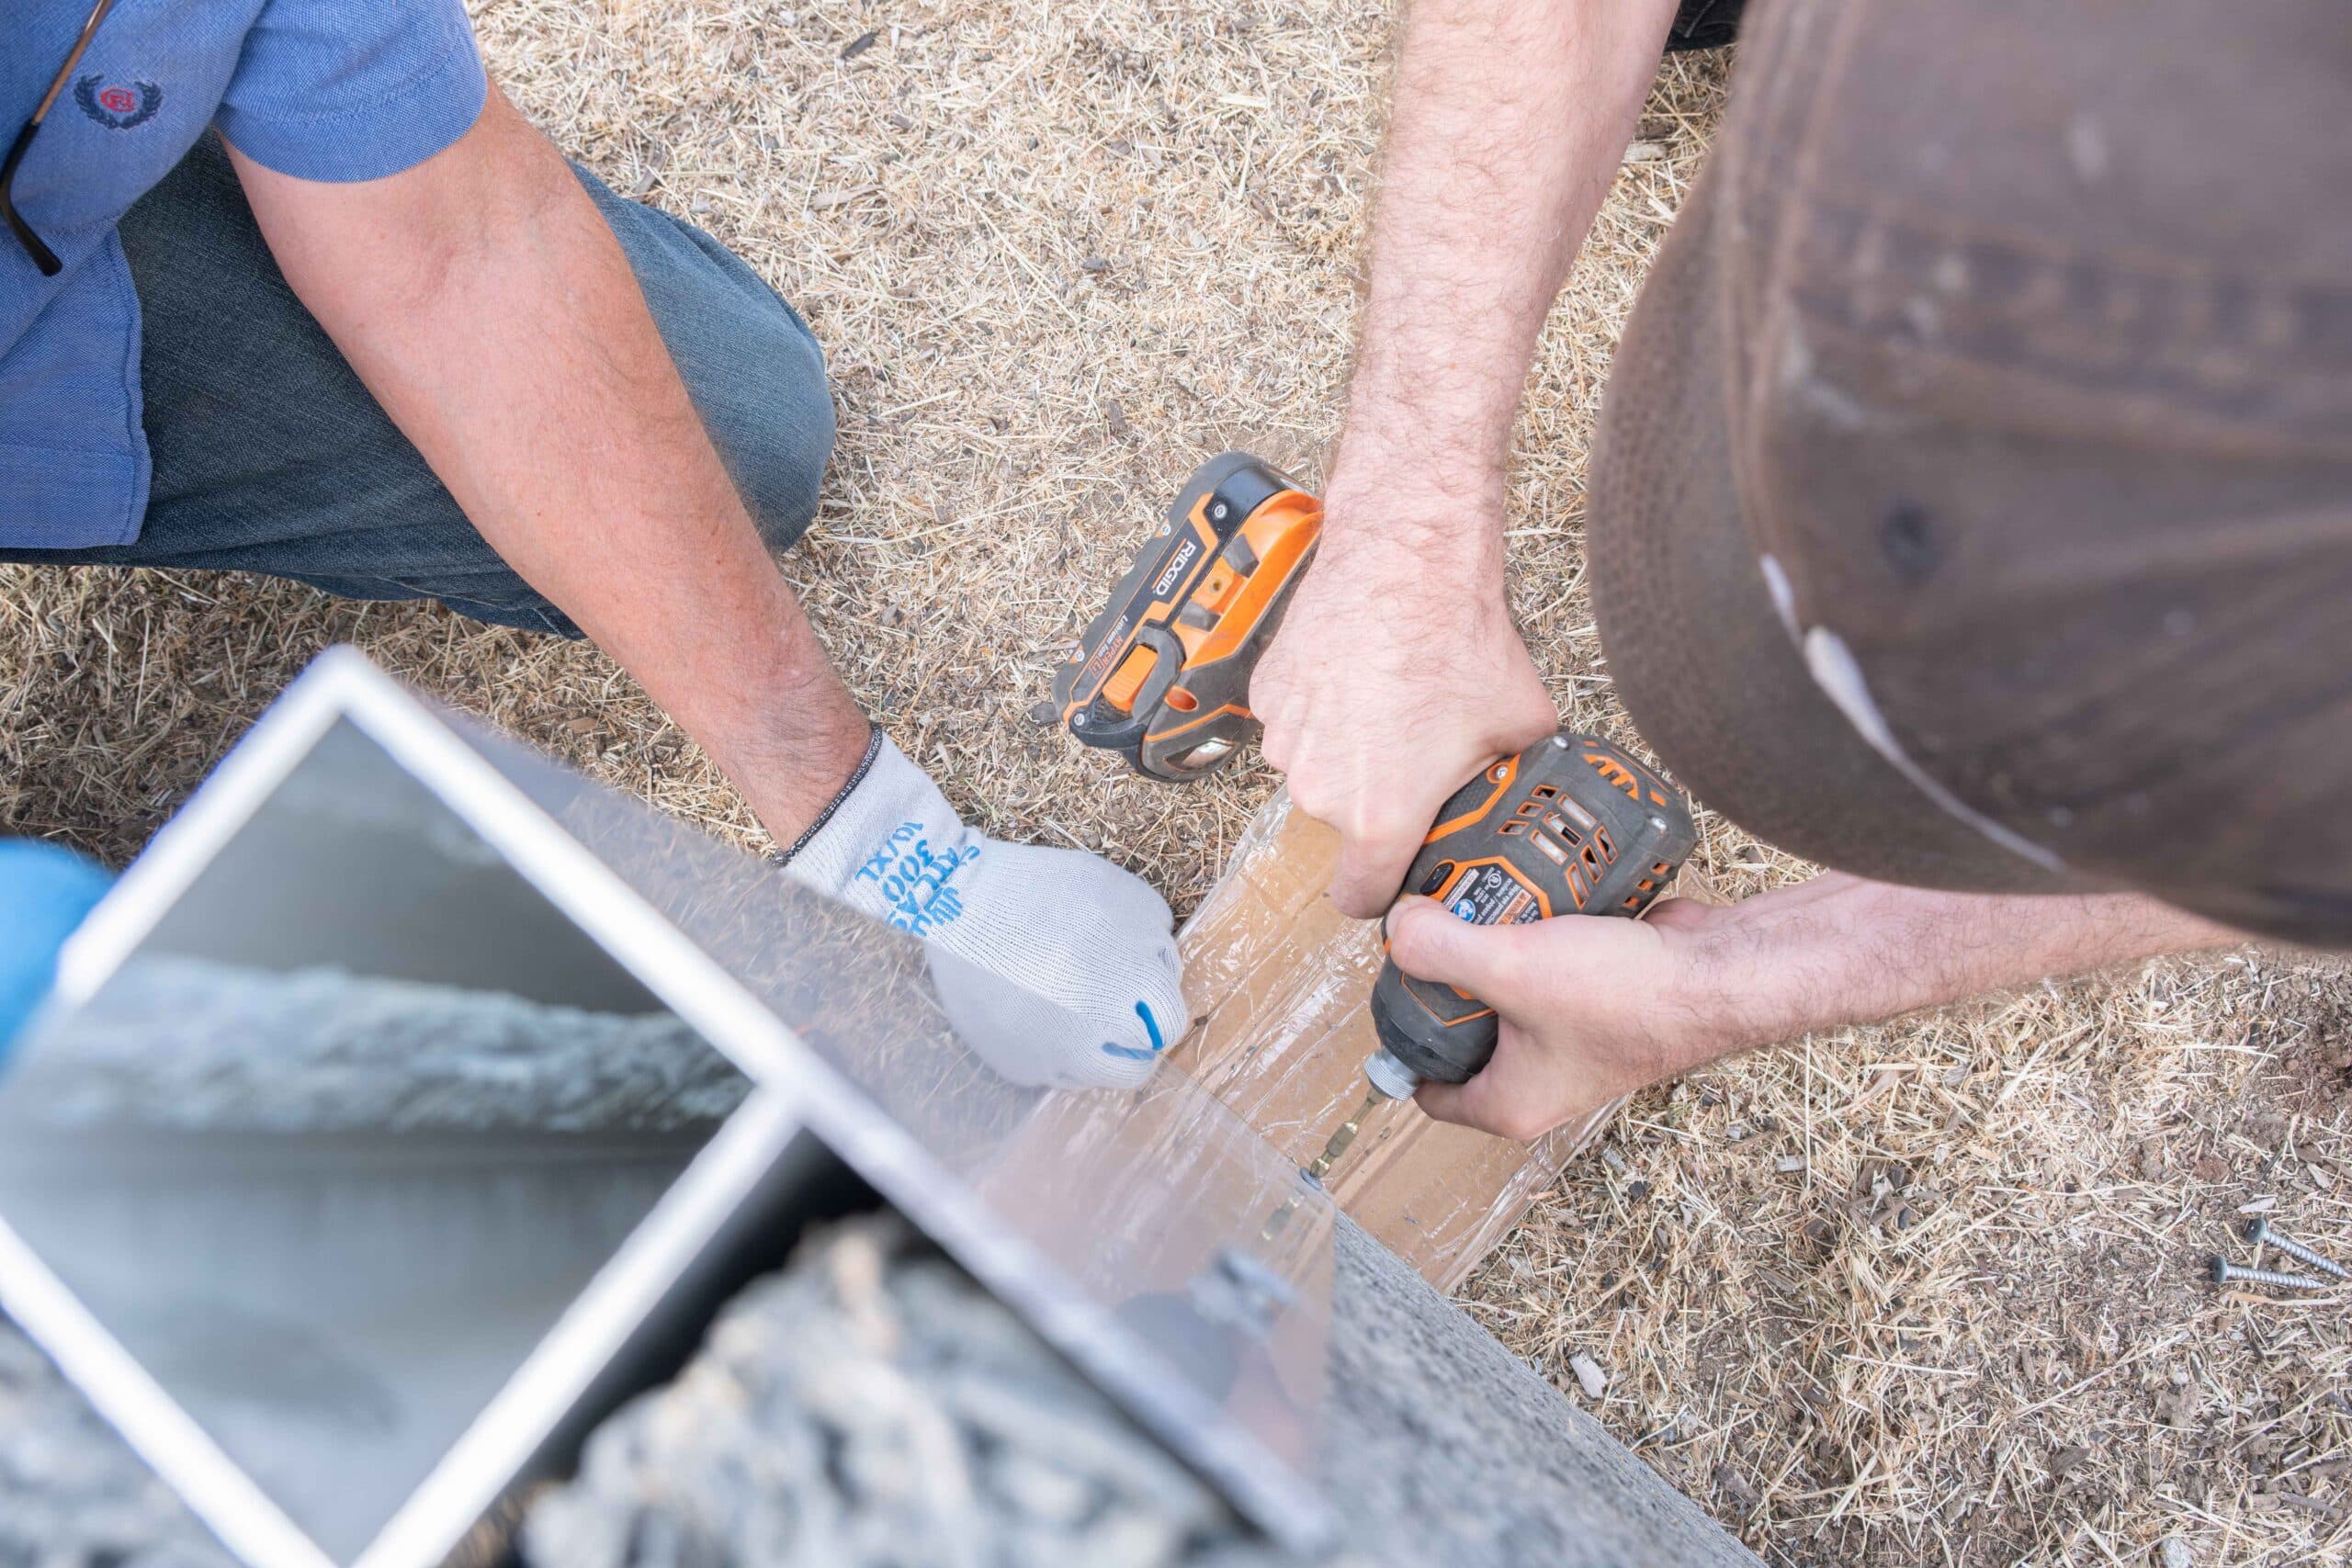
Also, when using the rubber washer screws, DO NOT over tighten them. Use a low torque setting on your cordless drill and FINISH TIGHTENING all screws with a .” socket wrench to avoid stripping out the GreenBed™ material.
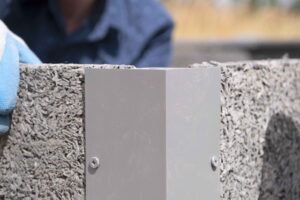
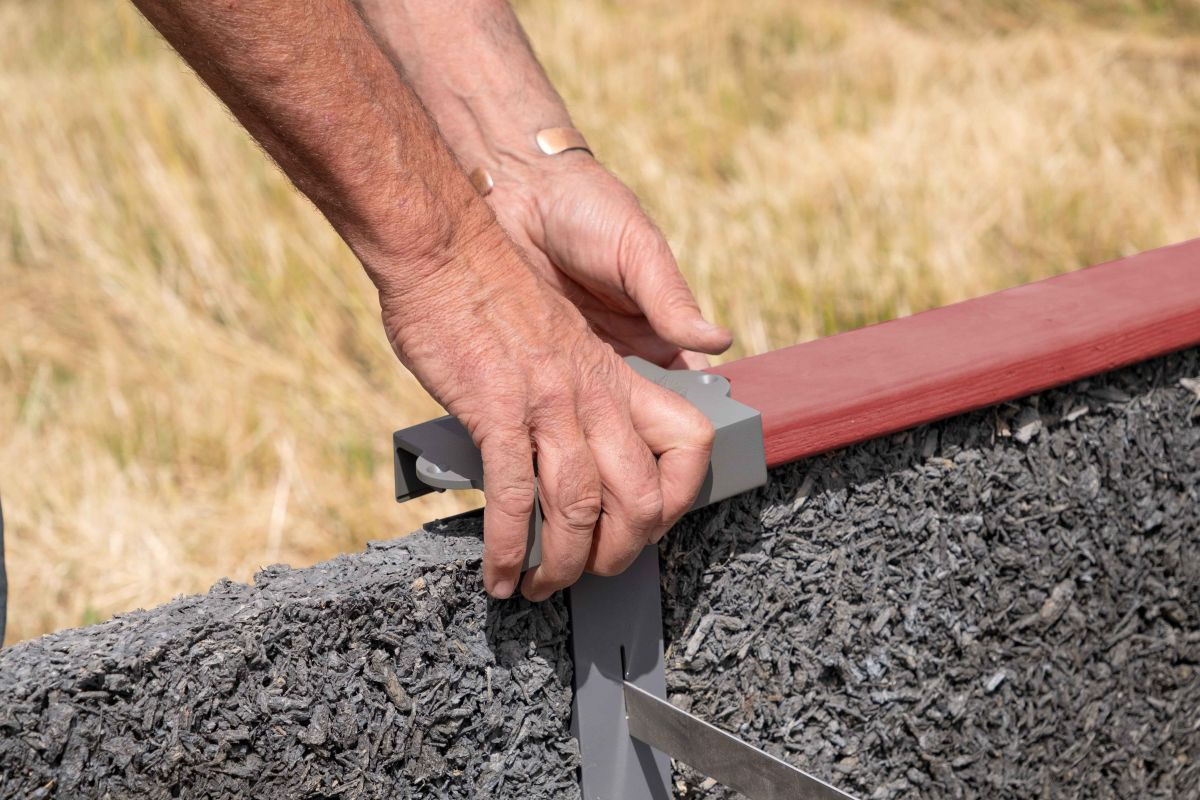
IMPORTANT NOTE: TOP goes up. the colored dimple on each panel indicates that this is the TOP of the installed panel. Also, the properly installed bracket is FLUSH with the top of the GreenBed™ panel.
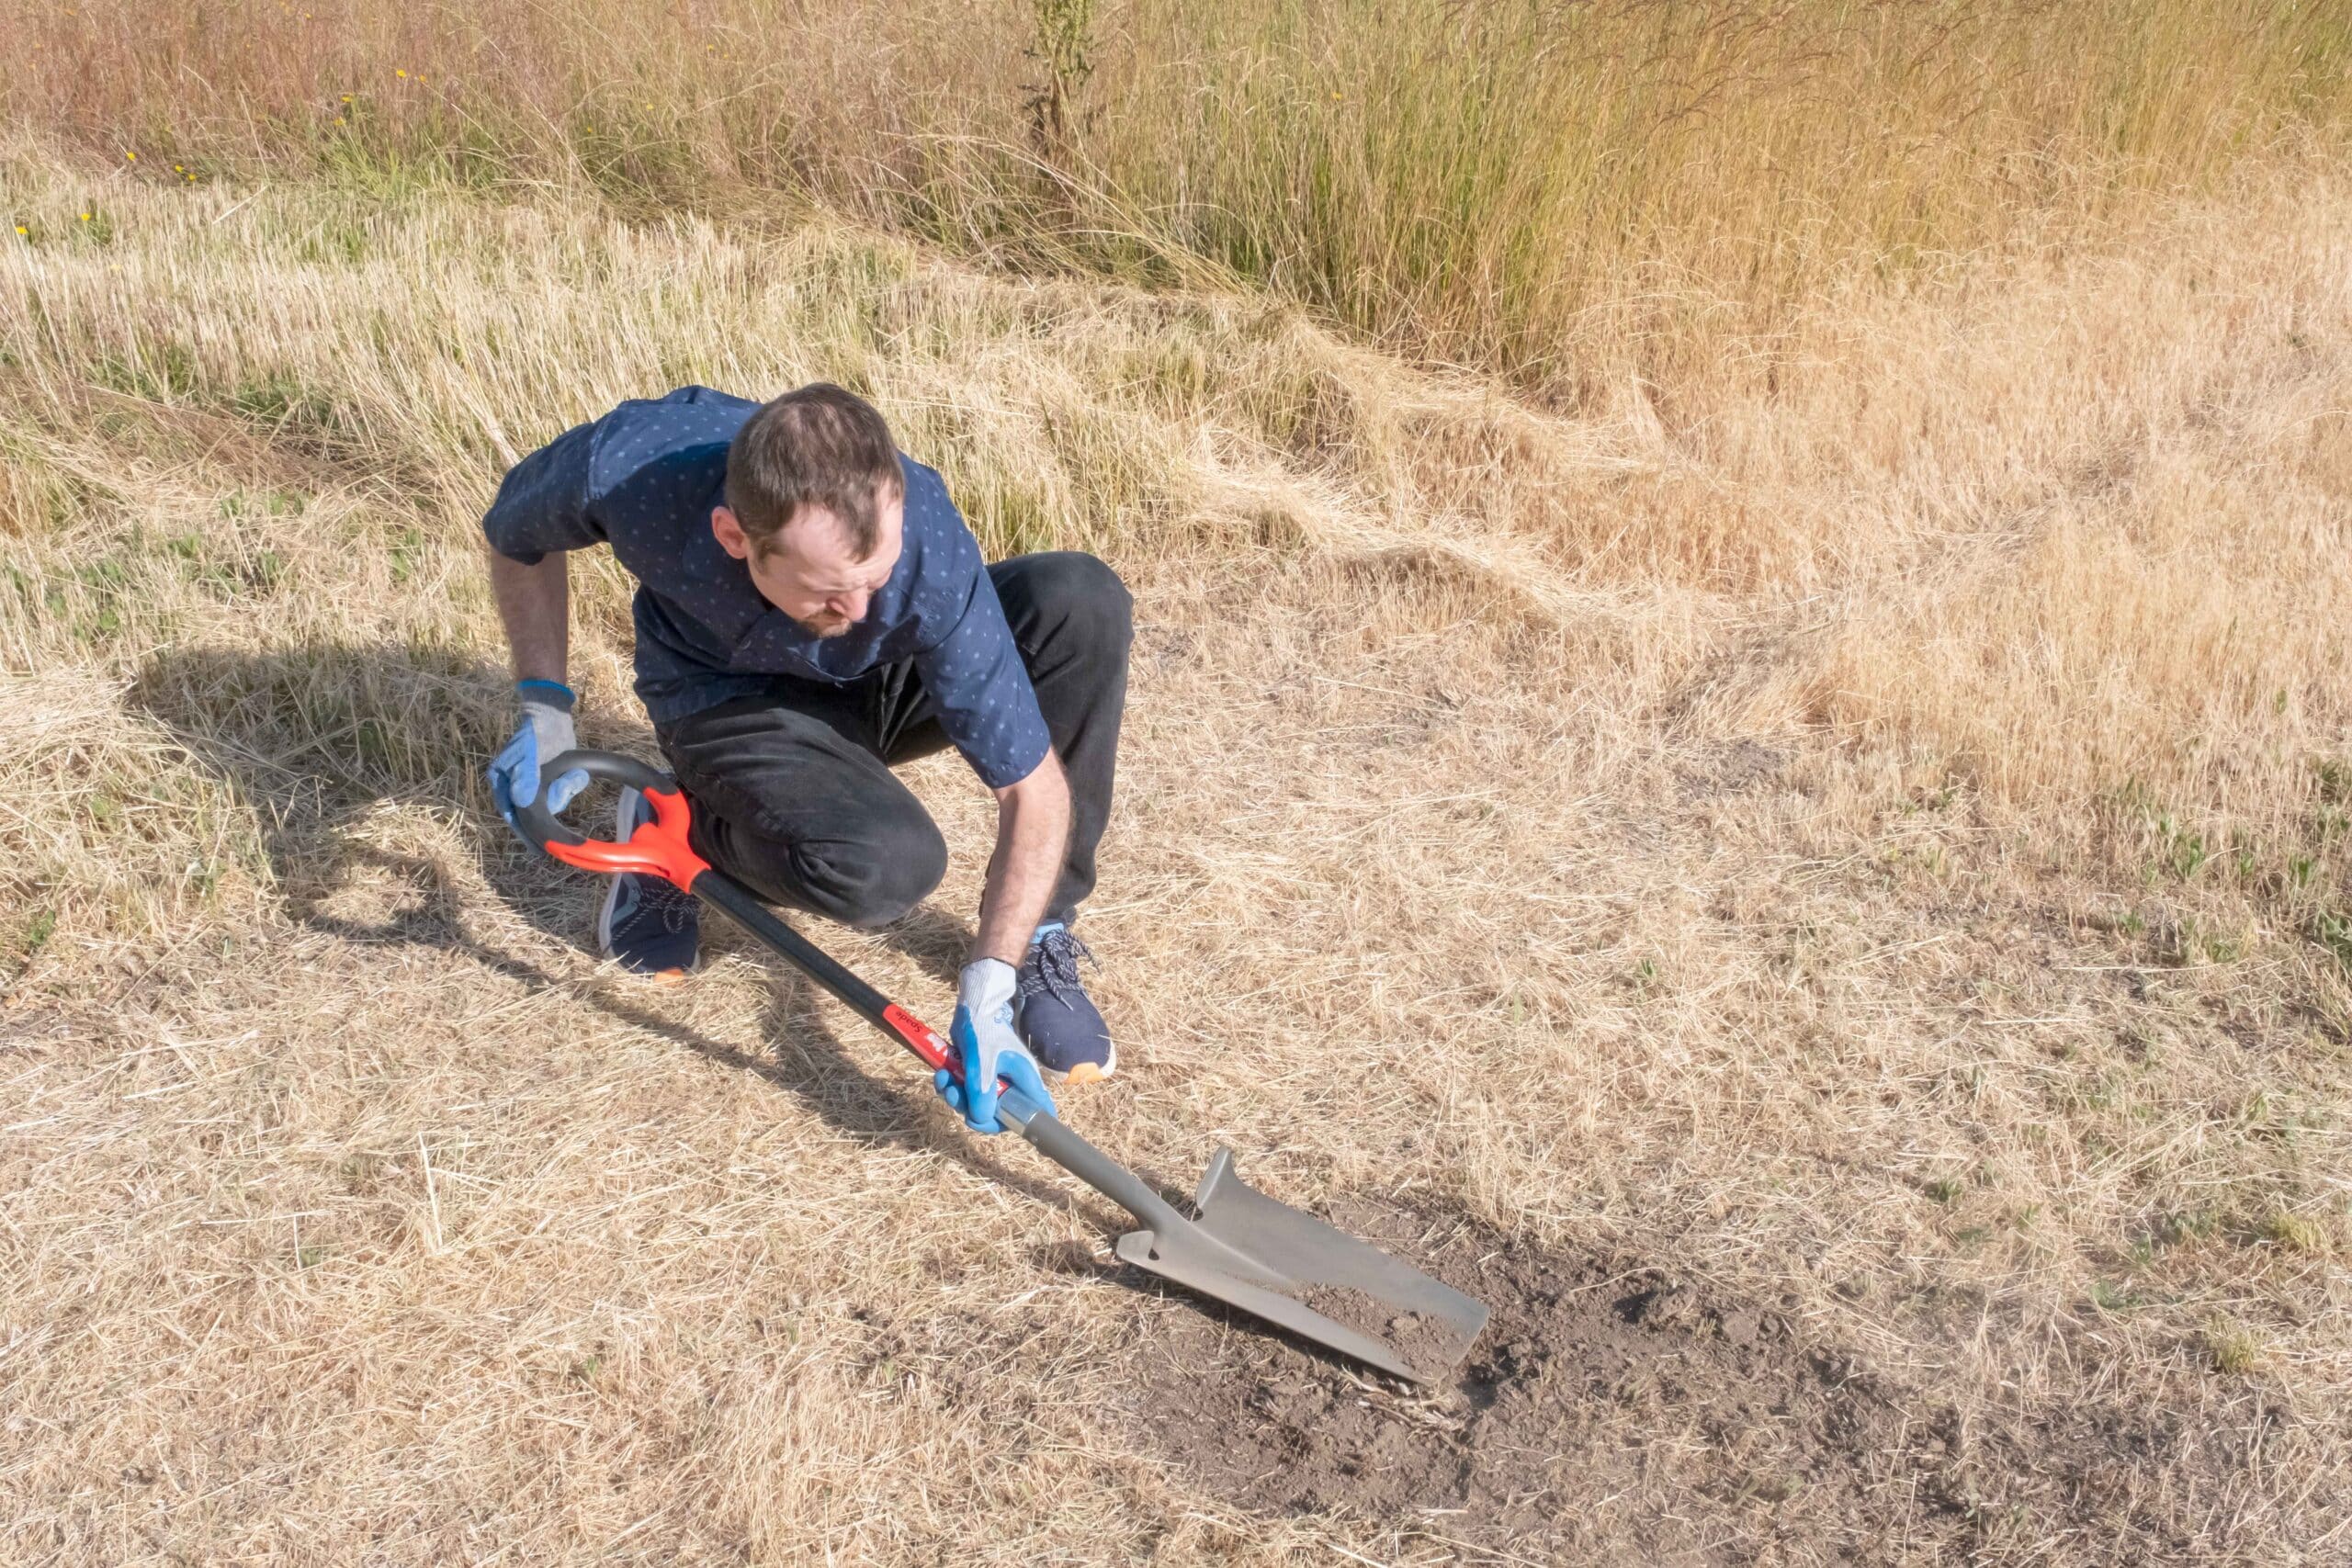
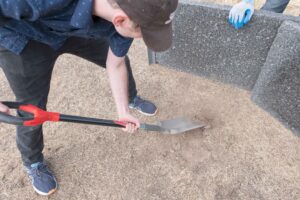
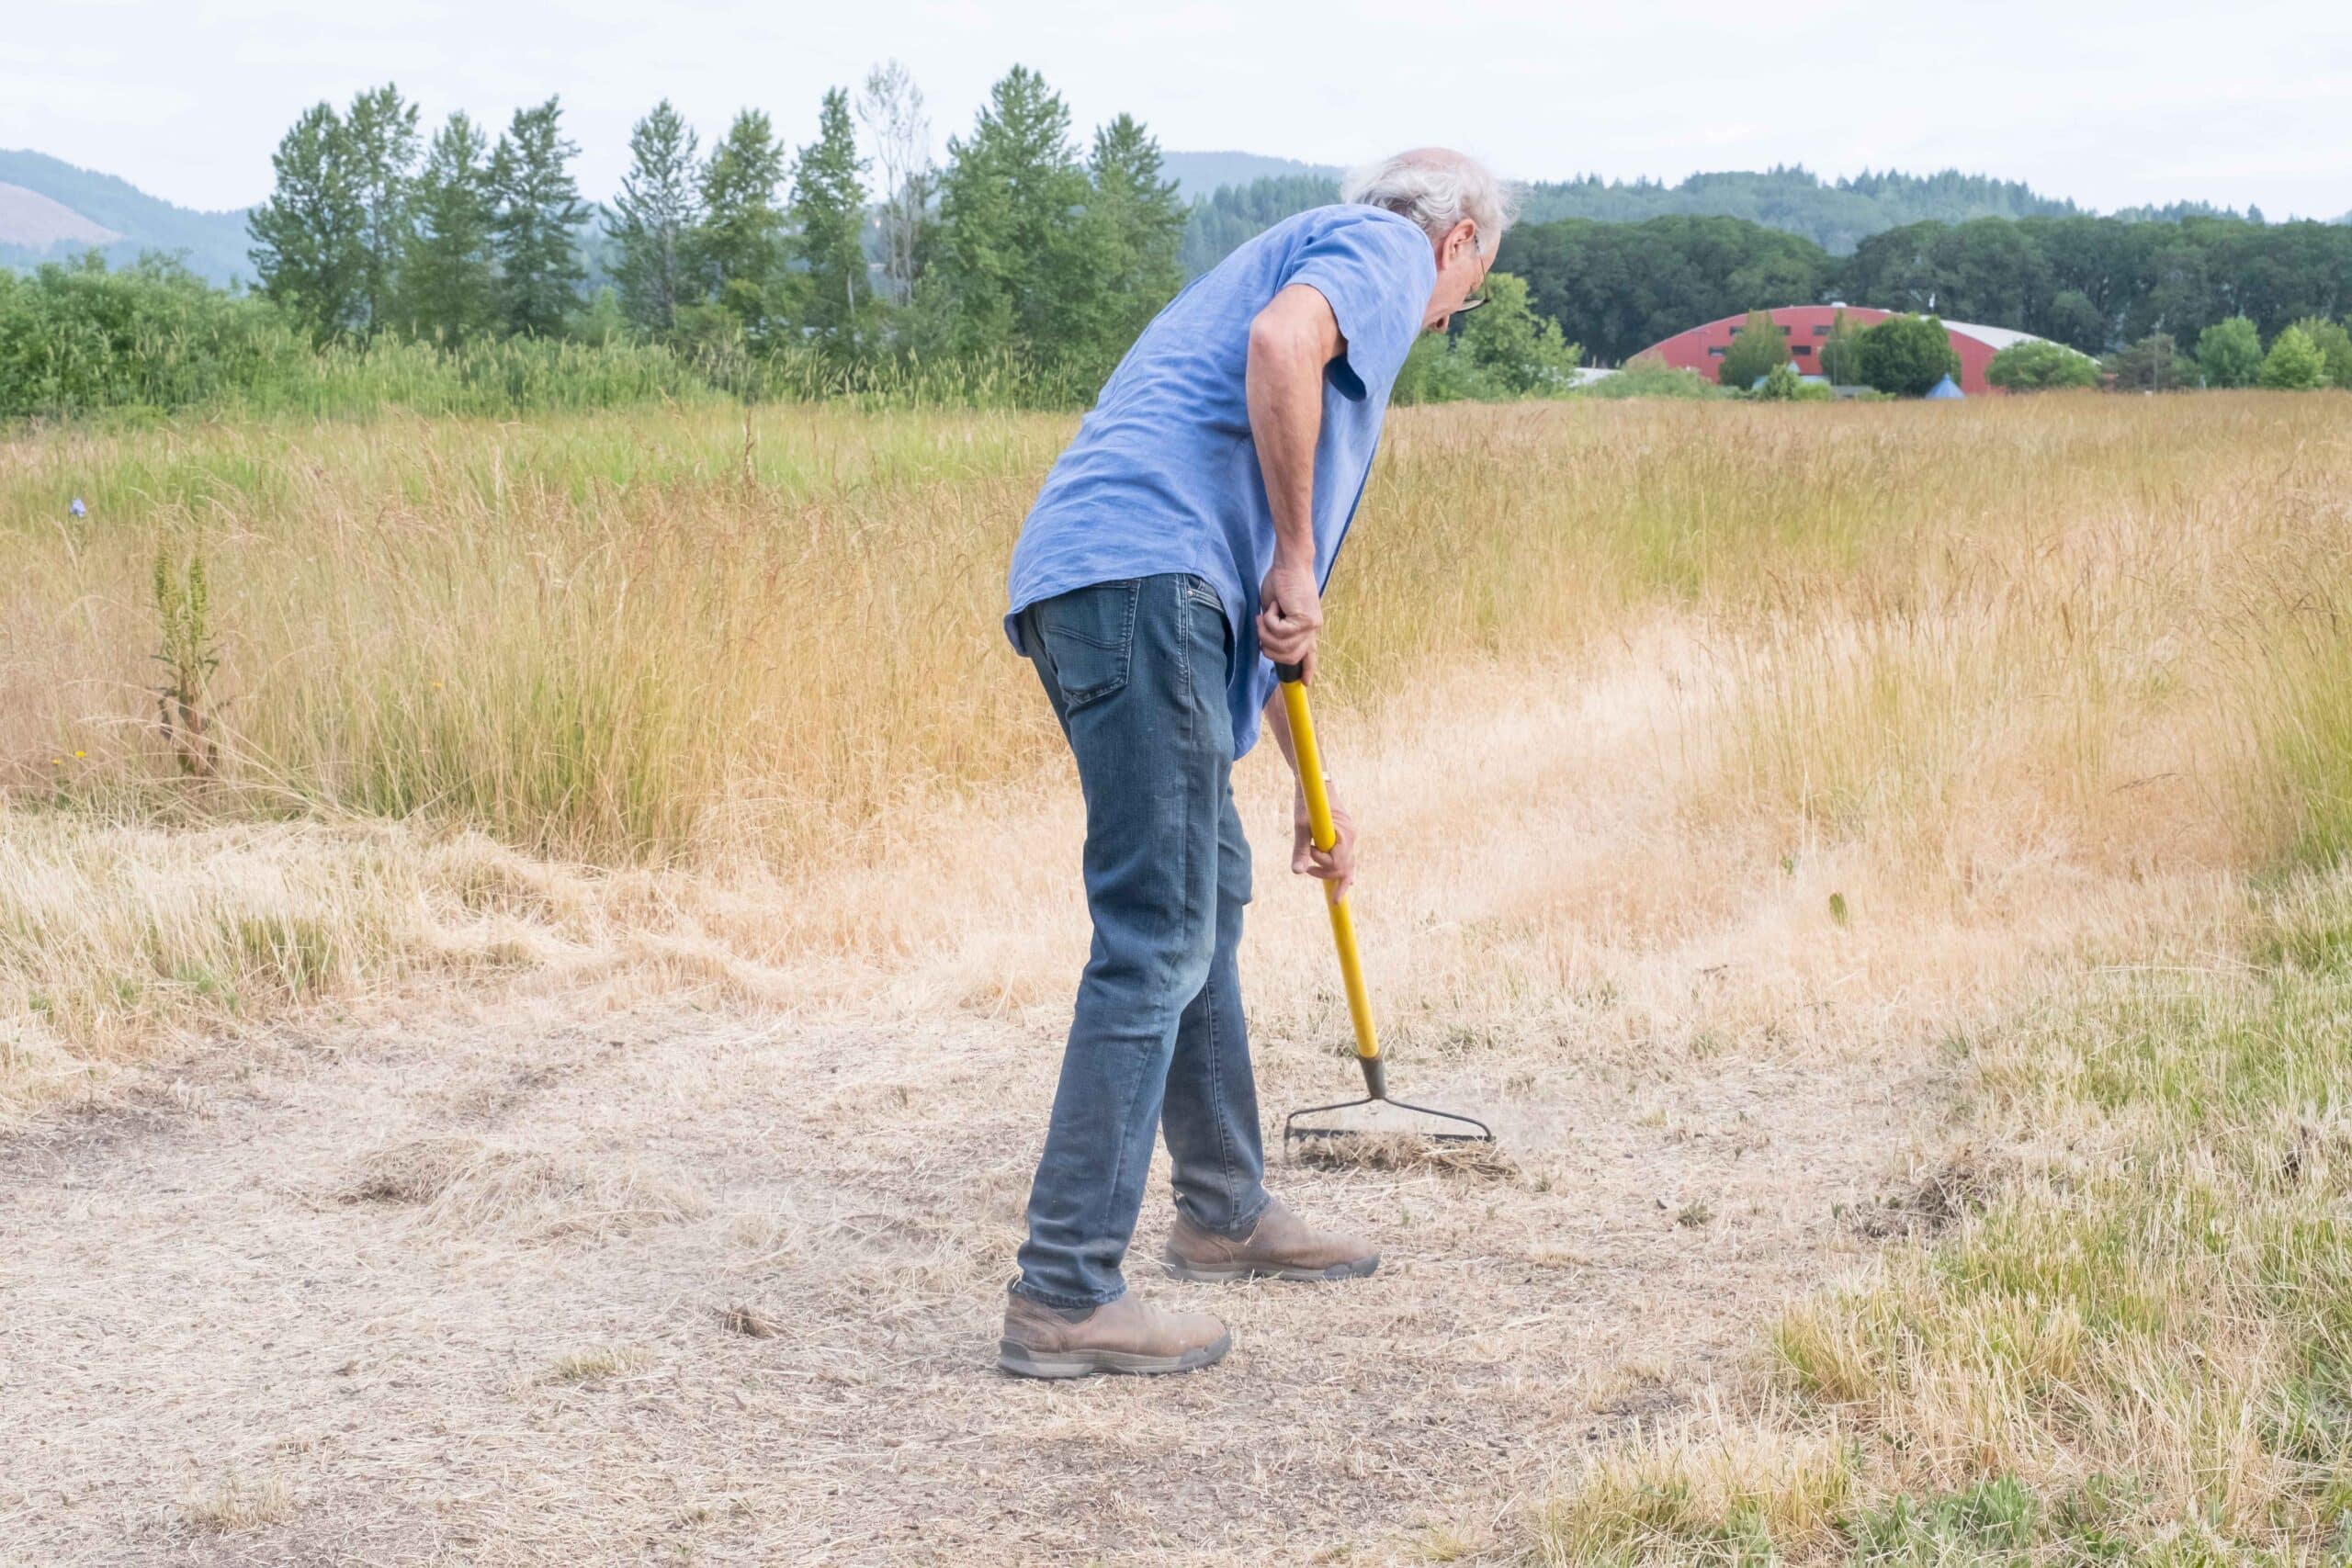
(1) Level the garden site. This step is VERY IMPORTANT. If the site is level, the installation will be MUCH FASTER. Remove rocks, roots, and debris that may prevent the panels from sitting straight and level. Using a laser level to check your work can speed up this process.
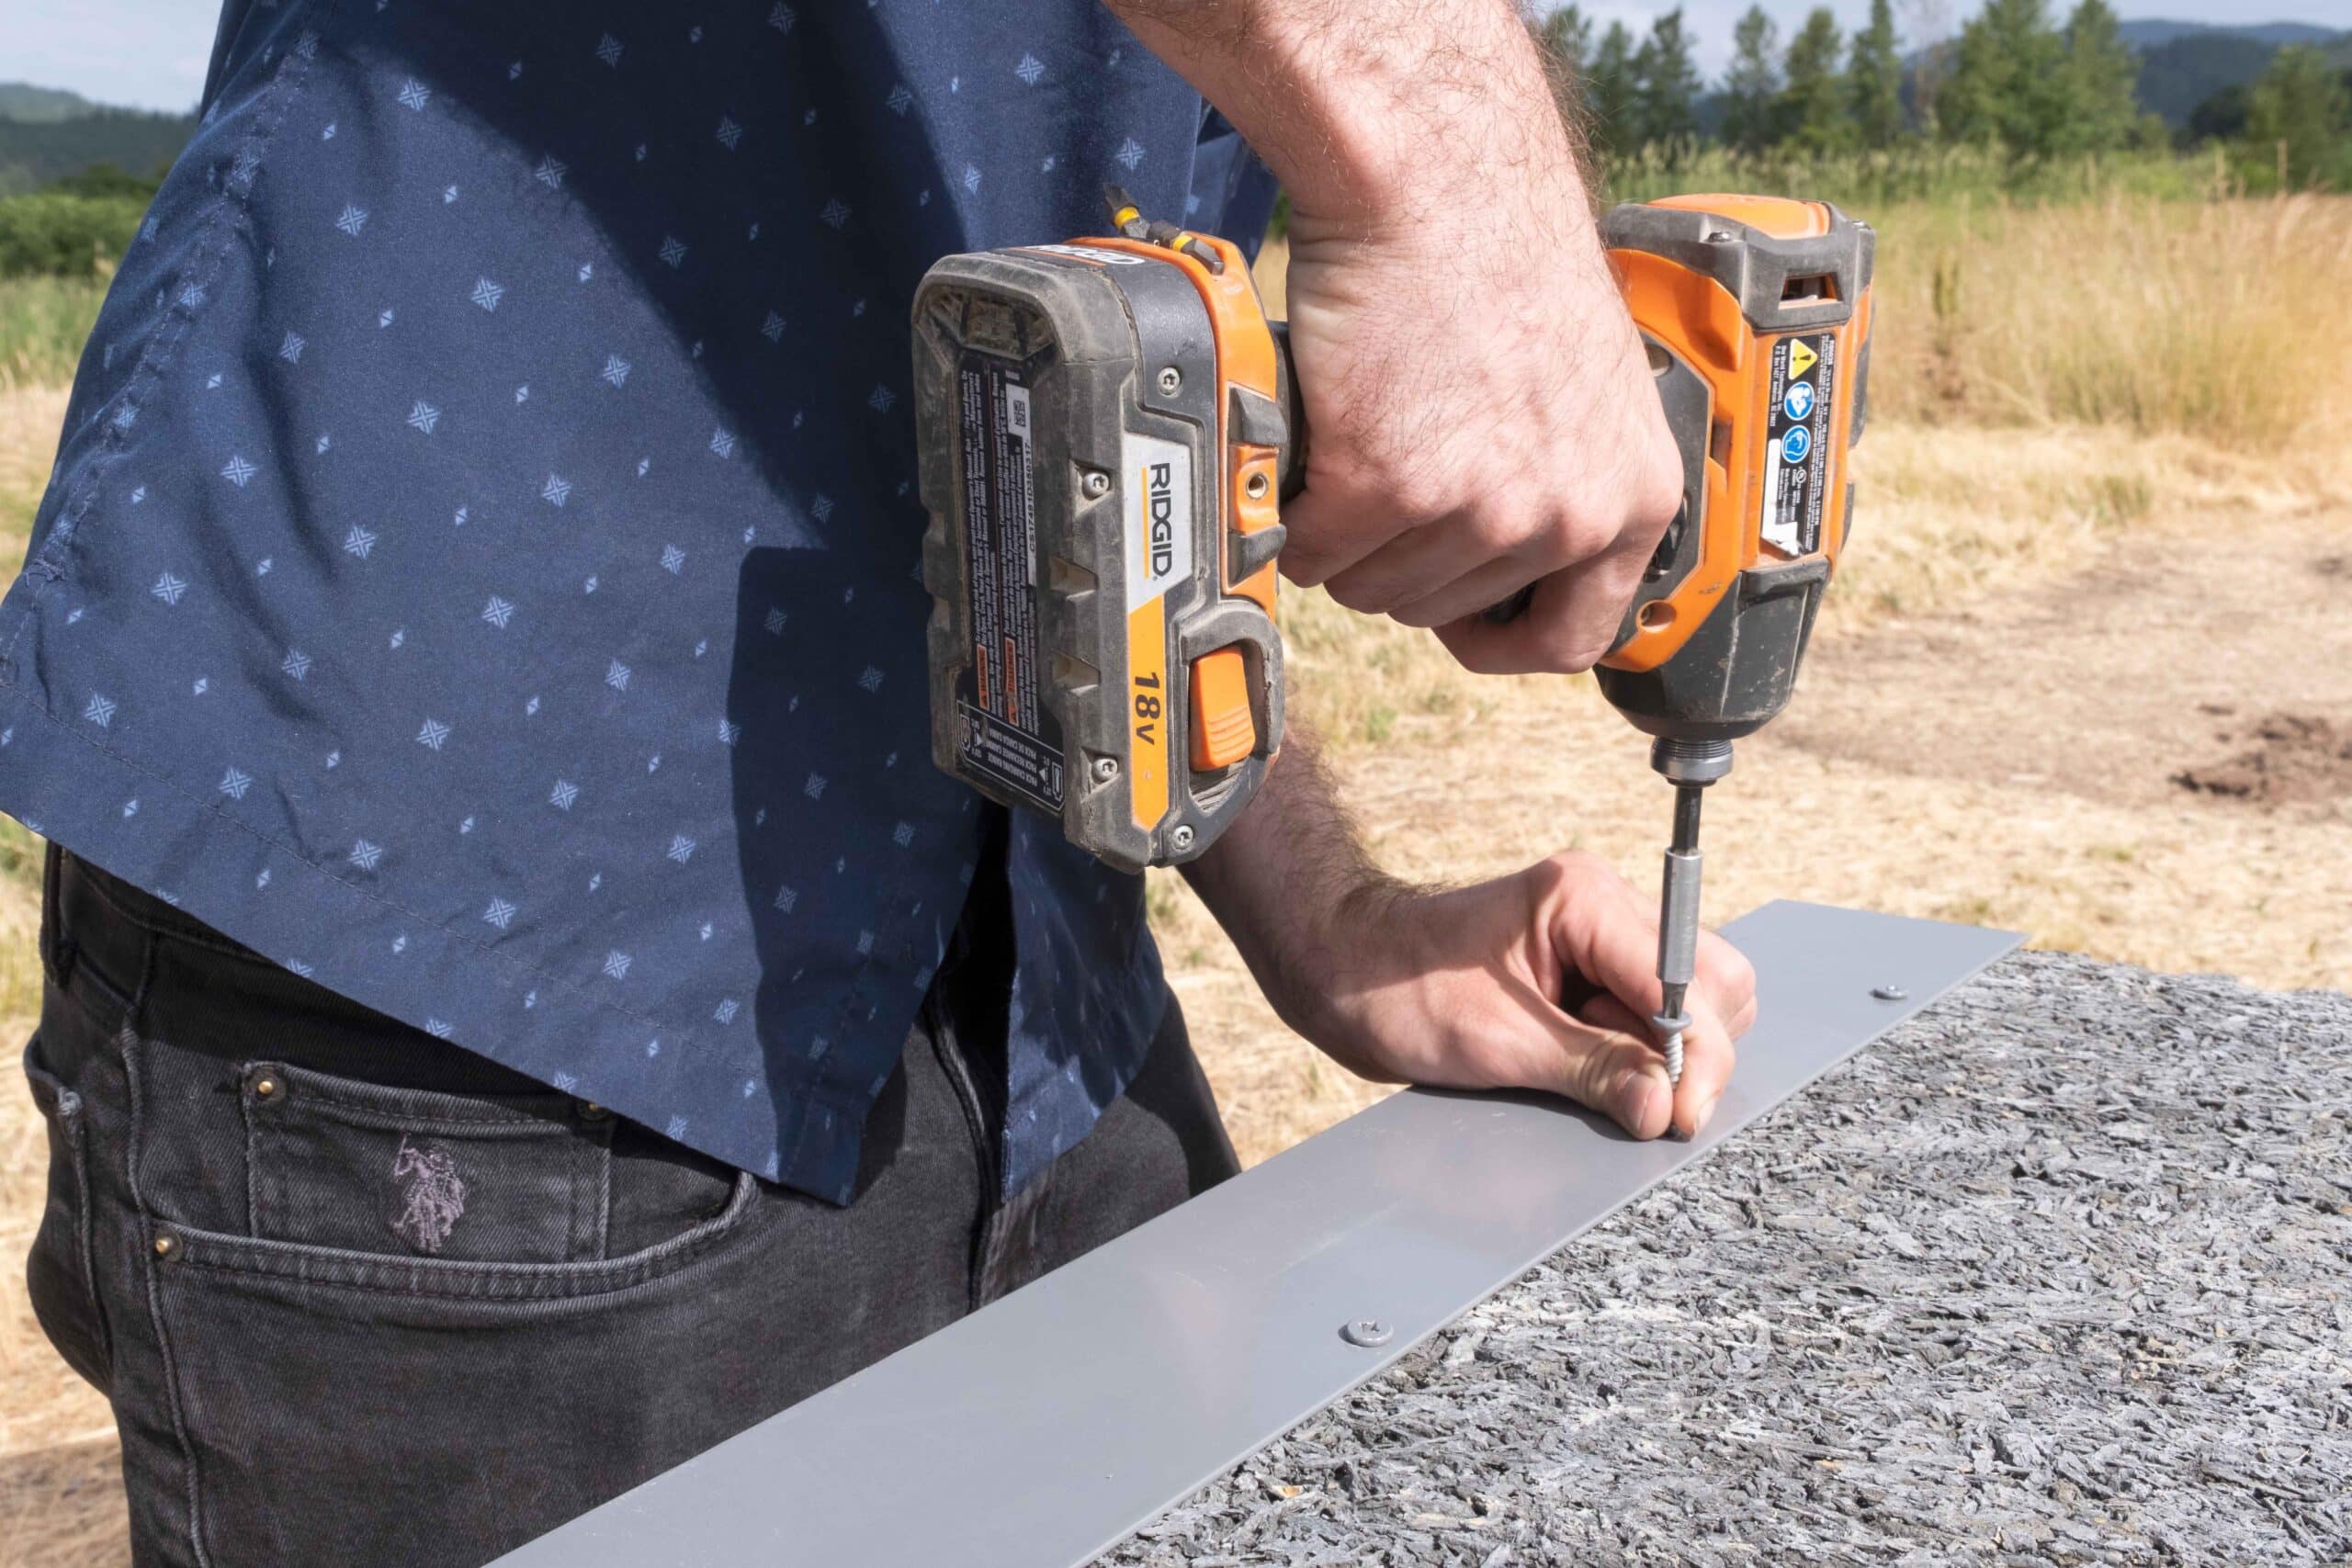
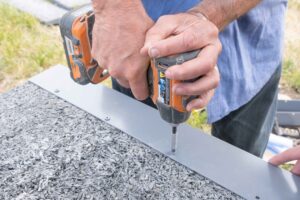
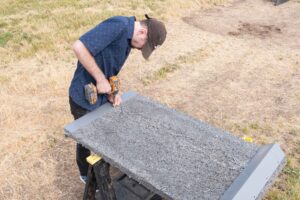
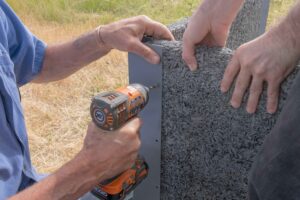
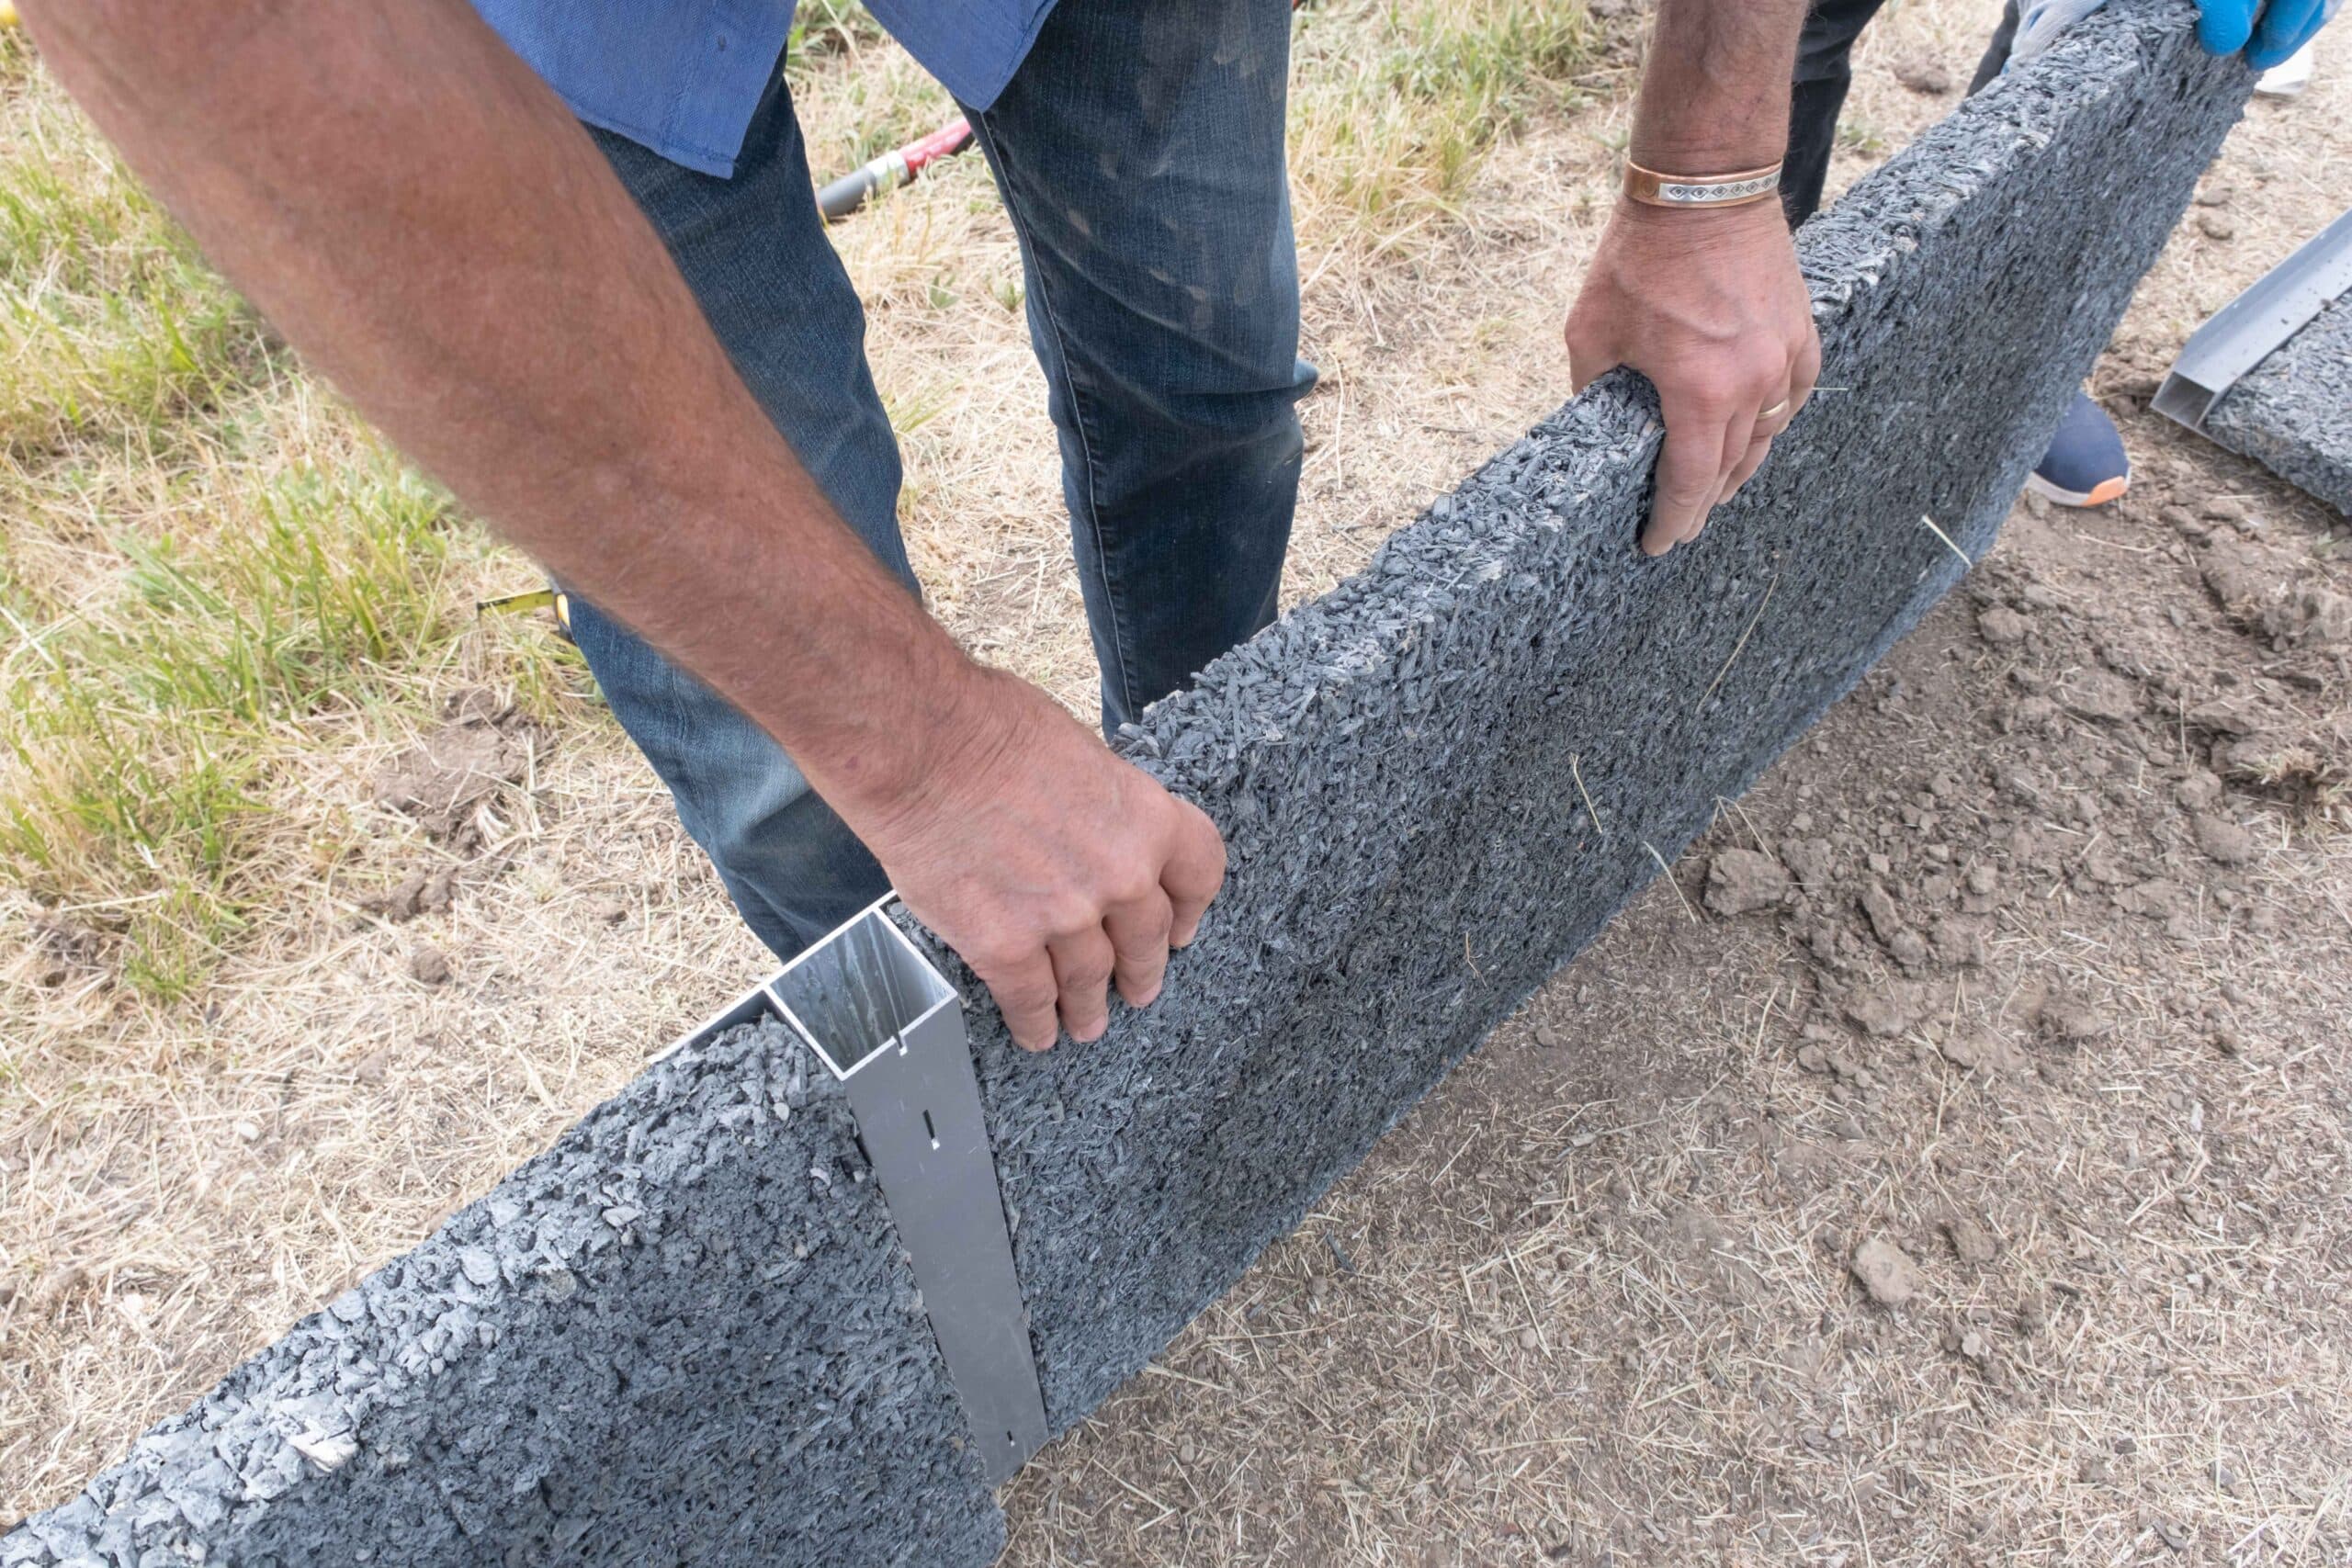
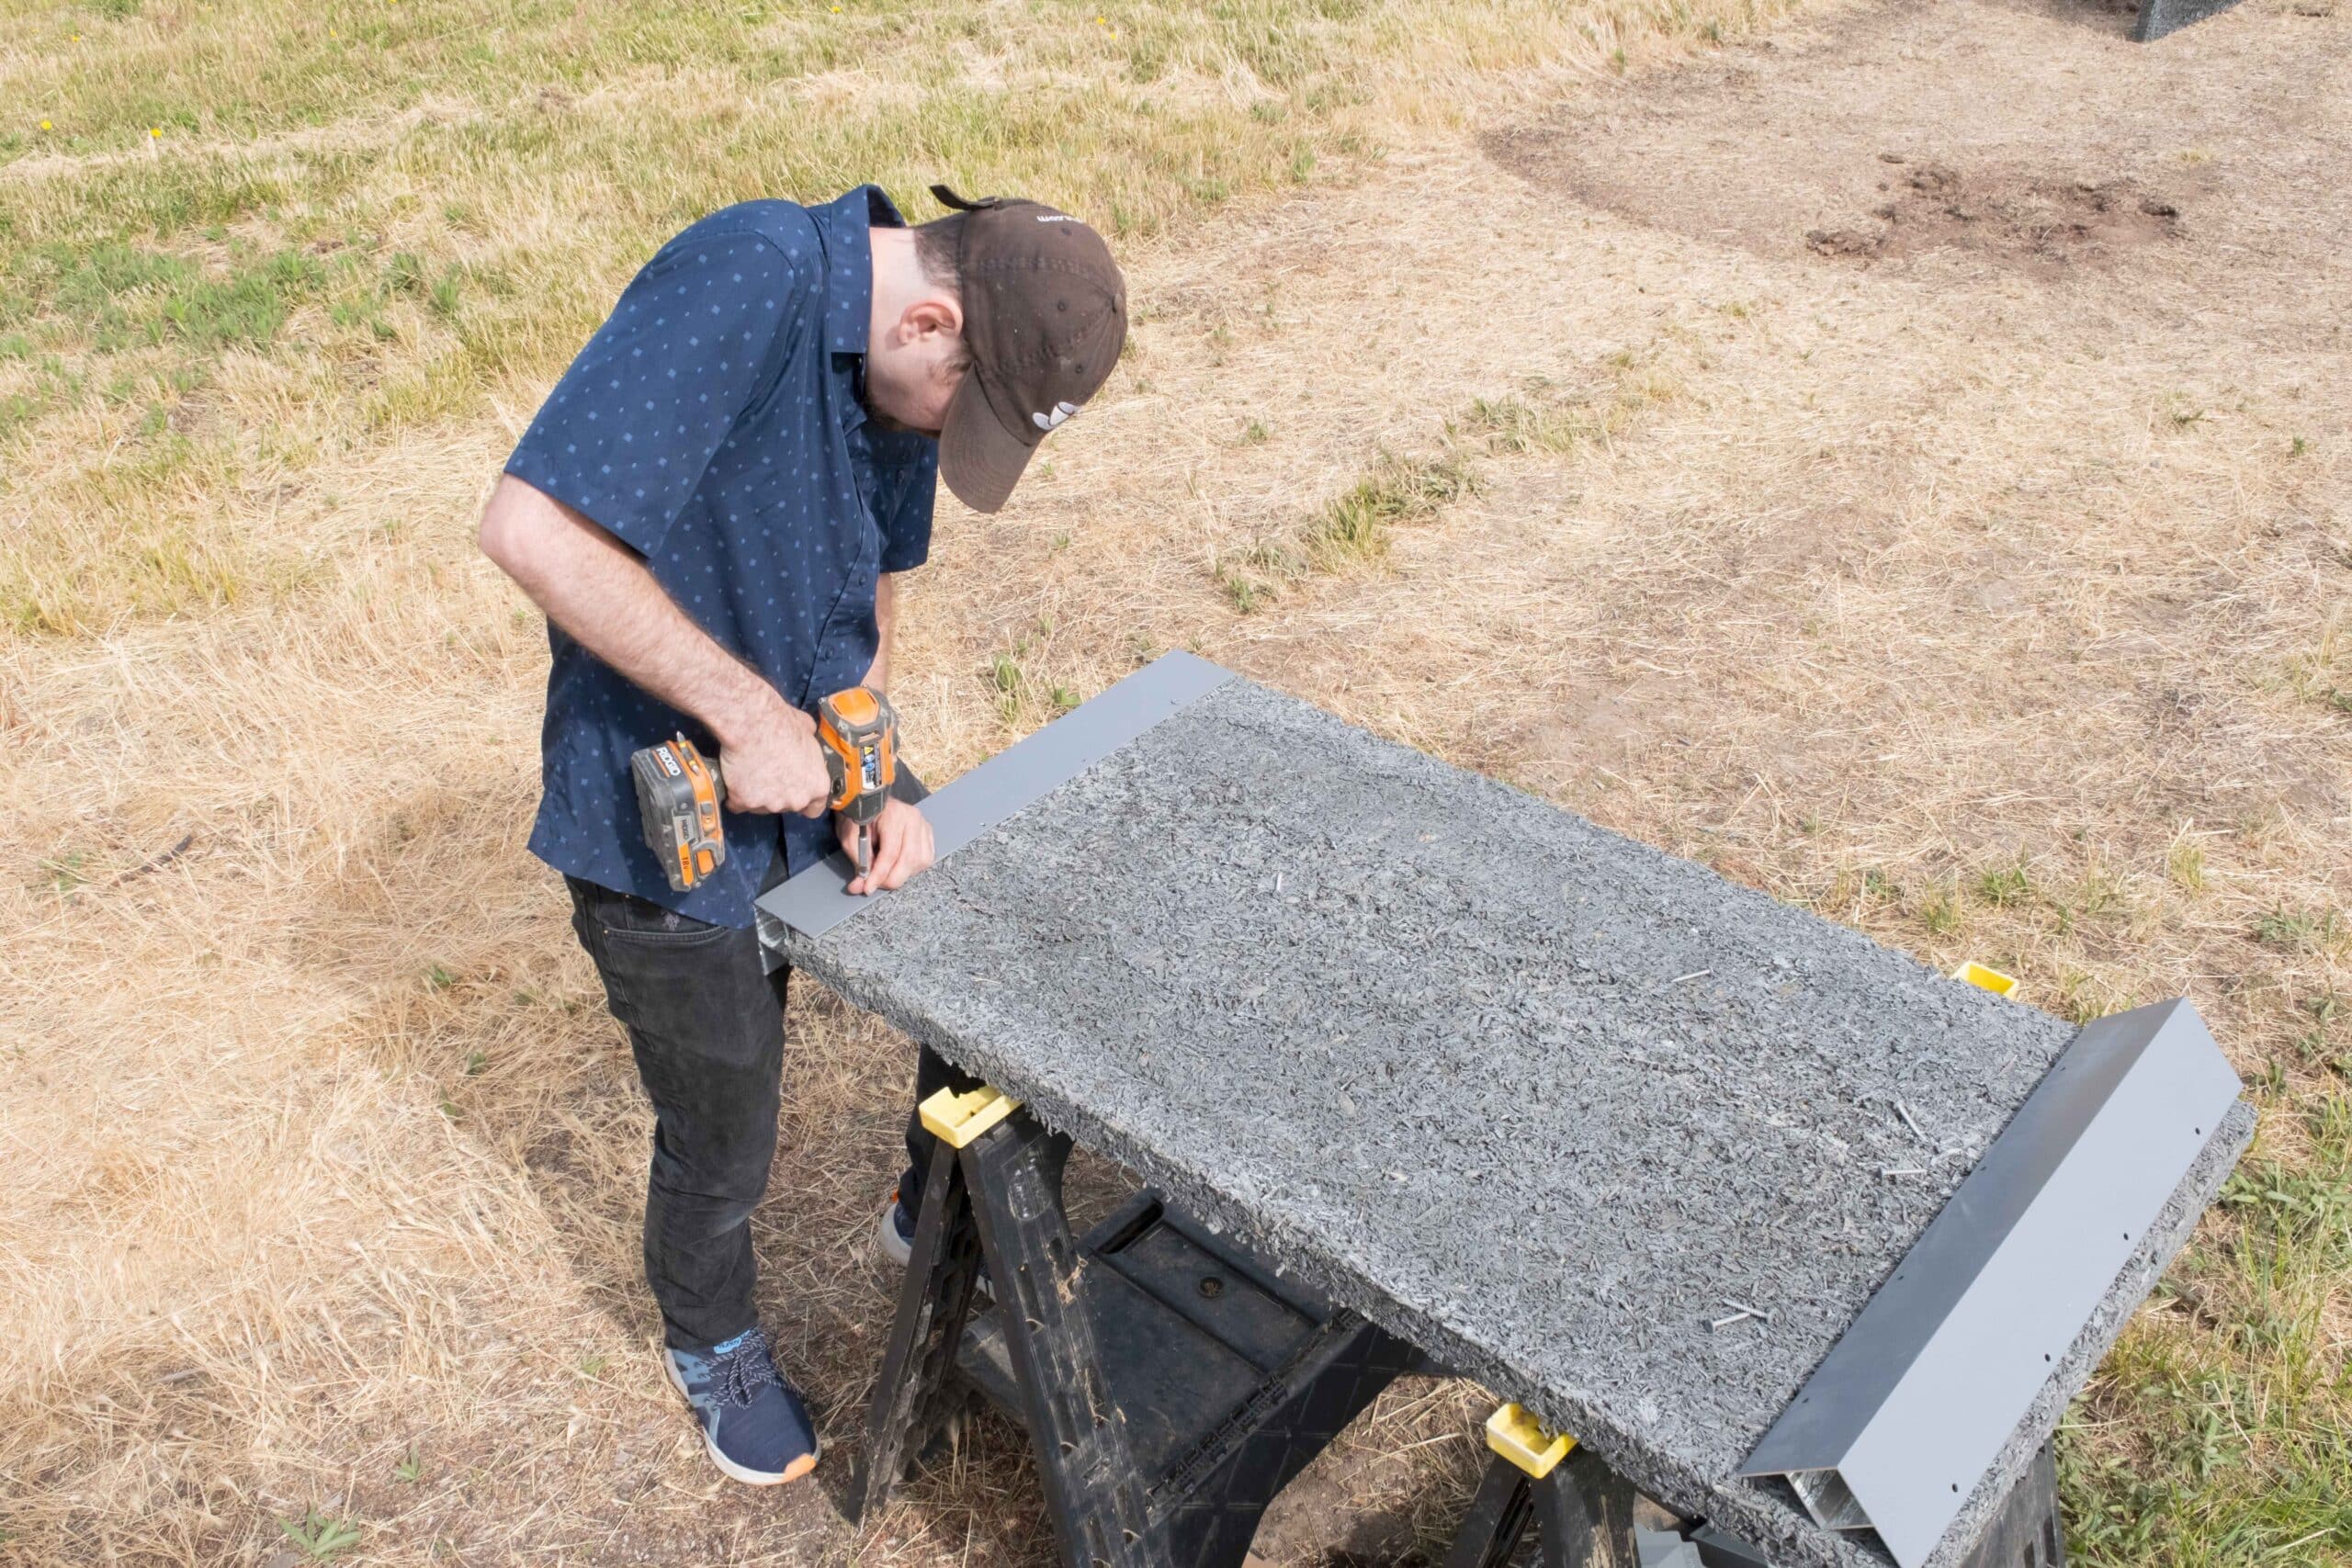
(2a) Place a Durable GreenBed™ panel on your saw horses or work table, smooth side up. Line up a corner bracket so it is ~1/16” below the top of the panel. This way, the bracket won‘t interfere with the trim installation later.
(2b) Use 1 1/2” screws to attach the bracket. Make sure each screw goes in straight. Use a cordless drill with a low torque setting, so that you don’t spin out the screws. Now, install a corner bracket on the opposite side of this panel using the same steps. After you’ve attached the first two corner brackets, set this finished panel aside and repeat these steps on a new panel. You should now have two completed end panels, each with corner brackets.
NOTE: This step doesn’t apply to 4’ x 4’ GreenBeds. Please skip to
Step 4.
NOTE: One GreenBed™ panel has a joiner bracket on the left, and the
other, a bracket on the right.
(3) Next, outfit two new panels, each with one joiner bracket. Place a new Durable GreenBed™ panel on your work table, smooth side up. Line up a flat, joiner bracket with the top of the panel. NOTE: Make sure the bracket sits ~1/16” below the top of the panel. Attach the bracket with 1 1/2” screws and set this panel aside. Next, create a second side panel, however this one will have the joiner bracket on the opposite side. These instructions show a 4’ x 8’ x 2’ bed, longer GreenBeds will continue these steps until all joiner brackets are used
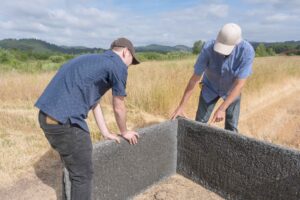
(4a) Now you are ready to start assembling the panels in your garden! Move one of the end panels with corner brackets to the garden, and a side panel containing a joiner bracket. NOTE: If you are building a 4’ x 4’ Durable GreenBed™, you will be using a panel without joiner brackets to attach to your end panel with corner brackets. All panels should be facing up, which is the side that has the bracket approximately 1/16” below the top of your panel.
(4b) Each time you join two panels together with a bracket, follow these steps:
a) Make sure each panel is level
b) Make sure they meet flush from top to bottom against the bracket
c) Make sure the tops of each panel meet at the same height.
d) Make sure that screws are straight when you drive them into a panel
(4c) Dig out dirt from under a panel to lower it, or raise a panel by placing a folded piece of your cardboard packaging under a panel.
Once both panels are level and meet at the same height, join them with 1 1/2” screws. Now, install the second side panel, with the attached joiner bracket, into the empty corner of the end panel. Again, make sure the panel and bracket fit flush from top to bottom, their heights match, and the panels are level before joining them with the 1 1/2” screws. Longer beds will continue with these steps until you use all of your side panels.
NOTE: If you are setting up a 4’ x 4’ Durable GreenBed™, skip to Step 7.
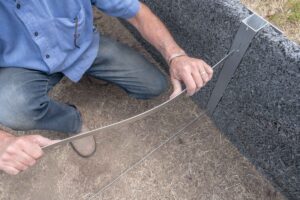
(5) Now, install the included metal straps between each joiner bracket. Gently bend the straps, as needed, to insert them into the slots. This will keep the sides of your raised bed from spreading during installation and later when you fill it with soil.
(6) Next, attach another side panel to extend the length of your GreenBed™. Dig out soil underneath the panel, or use a cardboard shim to make them flush. Make sure the new panel is level and meets the previous side panel evenly at the joiner bracket. Then, attach the panel to the previous joiner bracket with 1 1/2” screws. NOTE: You can see if panels are meeting at the right height by sighting down their length. This will also help you see if you have any sloping panels. Remember, you can use a folded piece of cardboard from your packaging to raise a panel or dig out dirt under the panel to lower it. Once this new panel is installed, add tension straps between the joiner brackets to hold them together. For longer beds, keep adding side panels and tension straps until you reach Step 7.
NOTE: Sight down the walls of your GreenBed™ to make sure that the sidewalls form a straight line. Move the side panels or the end panel until they look straight.
(7) Now, install the final end panel with the pre-installed corners to complete the bed. Check that the end panel is level, and adjust the side walls so they meet evenly with the corners of the end panel. Use 1 1/2” screws to secure the corner brackets to the side panels.
(8) Check your finished bed for squareness by measuring both directions diagonally. Dimensions should be within 3/8” of each other. Adjust panels as necessary to square it up.
NOTE: 4’ x 4’ Durable GreenBed™ kits do not include the joiner brackets and caps.
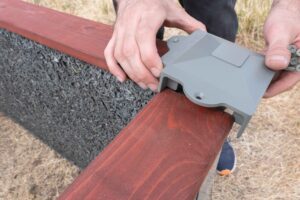
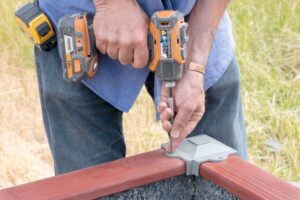
Finally, place your trim pieces so that each one covers a panel around your Durable GreenBed™. Drop the corner and joiner caps over your trim and into the appropriate bracket holes. These will hold your trim securely. Slide each piece of trim back and forth before you add screws so that it sits more evenly between the caps. Drill 1/8” pilot holes through each cap opening so the wood doesn’t split. Then use the 2 1/2” deck screws to secure the cap, trim, and
panel together.
Finish securing your trim by adding two additional screws to the middle of each trim board. Congratulations, your Durable GreenBed™ is complete.
